Engineering GUI
This chapter describes the features and usage of the CCF Engineering GUI (for short CCF GUI). The purpose of this is to provide a general purpose engineering tool, to interact with a CCF instance, stand-alone.
The tool allows for switching states, starting and stopping image acquisition, setting up certain parameters, and supervising the status of the associated CCF instance.
It is not meant as a production tool, although it may be used for troubleshooting in the production environment, to help understand issues encountered in a CCF installation.
The CCF GUI is based on widgets provided by the “ifw-wdglib” project.
Note: The CCF GUI, provided with IFWv5, is the first implementation and provides only a limited set of features. The tool will evolve over the next years and will provide more features for interacting with the assoicated CCF instance and for viewing the status and image data produced. Nevertheless, it is believed that the tool in its present form, can be useful to help controlling CCF.
The GUI Panel
A snapshot of the CCF GUI is shown here:
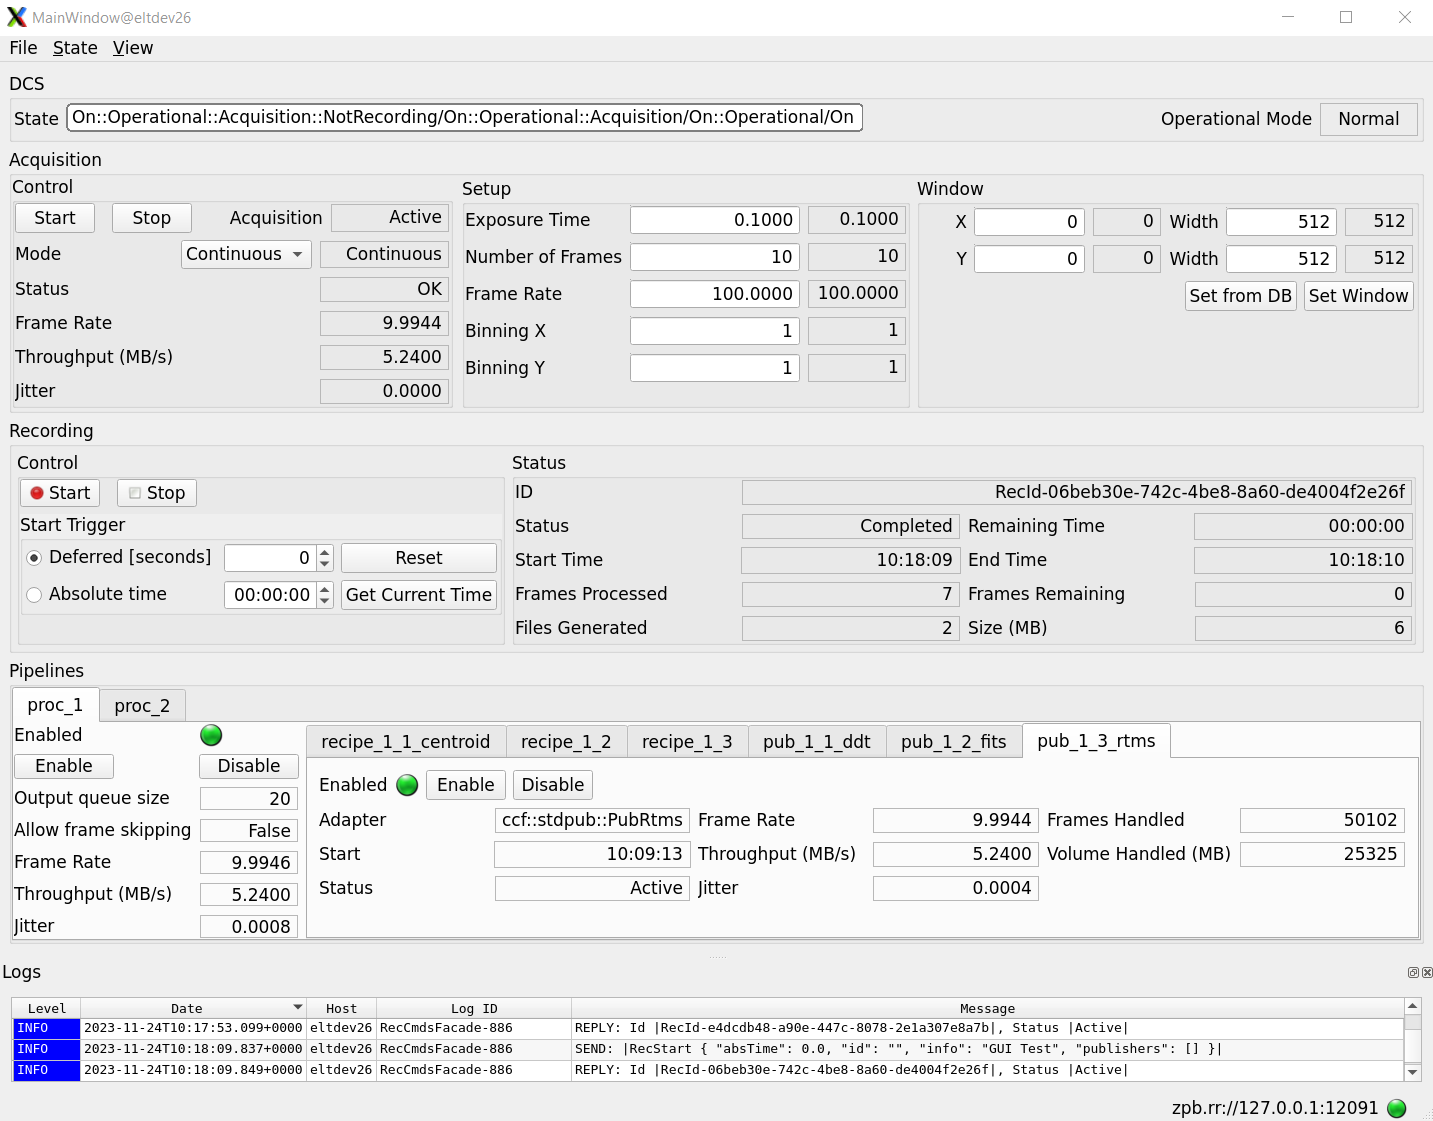
In the following the various functional sections of the panel are explained individually.
Top Menu
The panel top menu is shown here:
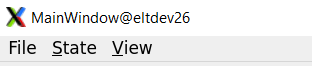
The options under the pull down manus are as follows:
File: Offers only an option to exit the panel for now.
State: Used to control the state machine handling of the associated CCF instance.
View: Allows only to redock the log output widget for now, if it had been undocked previuously.
DCS Widget
The DCS Widget is shown here:

The DCS Widget shows the current state of the associated CCF instance.
The DCS state machine is described here State Machine.
In addition the operational mode is shown, which is either Normal Mode or Simulation. Whether to run in either of these modes, is adjusted via the CCF configuration.
Acquisition Widget
The Acqusition Widget is shown here:
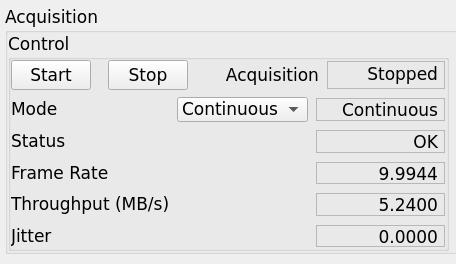
The image acquisition can be started and stopped. The current status is shown “Active” or “Stopped”.
It is possible to select whether CCF should run in Continuous or Finite Acquisition Mode; for latter, it will only carry out the “Number of Frames” specified in the setup. After that the acquisition stops.
The “Status” indicates if the frames are arriving within the expected window of time. If not, an error is shown in the output.
Some statistics about the performance is provided:
Frame rate: Frames handled per second by the Acquisition Thread.
Throughput: The average amount of bytes being handled.
Jitter: The jitter of the frame handling, calculated as a sliding window of a configurable amount of bytes.
Setup Widget
The Setup Widget is shown here:
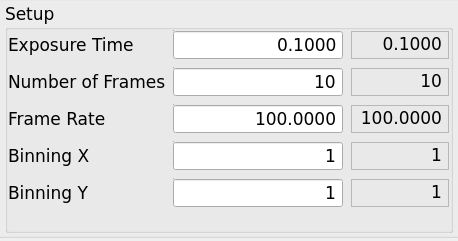
The basic parameters, shown in the picture can be modified for now. Other setup parameters are defined; some of them can be adjusted via the “Setup” command, if not supported by the panel.
When values are changed, the new value is typed into the left input box, then return is pressed. If an error occurs durig handling, the status value (right) will not be updated. Instead an error will be shown in the log output (if activated).
Window Widget
The Windowing Widget is shown here:
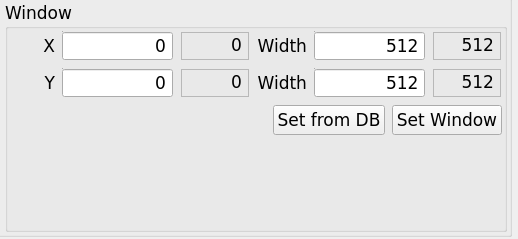
It is only possible to set up all 4 ROI parameters at the same time. The current values in use by the associated CCF, can be set in the inputs by pressing “Set from DB”. To set up the window, the “Set Window” button is pressed.
Recording Widget
The Recording Widget is shown here:

The recording widget is used to request the CCF to start recording data into data product files.
If “Start” is pressed and “Deferred [seconds]” is 0, the Recording Session will be executed immediately.
If a time is given in the input for “Deferred [seconds]”, the Deferred Recording feature of CCF will be activated and the recording started after the specified amount of seconds.
To set the delay back to 0, the “Reset” button can be selected.
If a Deferred Recording Session, to be executed in absolute time is required, the “Absolute Time” button shall be selected and the time entered. By pressing “Get Current Time”, the current time is written to the input and the “Absolute Time” button select automatically. Note, if giving an absolute time before the current time, the Recording Start is received by CCF, will result in an error.
The status of a Recording Session being executed, is shown in the “Status” area of the widget.
If a Deferred Recording Session has been selected, the “Remaining Time” will include also the time to wait for starting the recording.
For this version it is not possible to set the Recording ID manually. It is also not possible to query the status of previously executed recordings.
Pipelines Widget
An example of the Pipelines Widget is shown here:
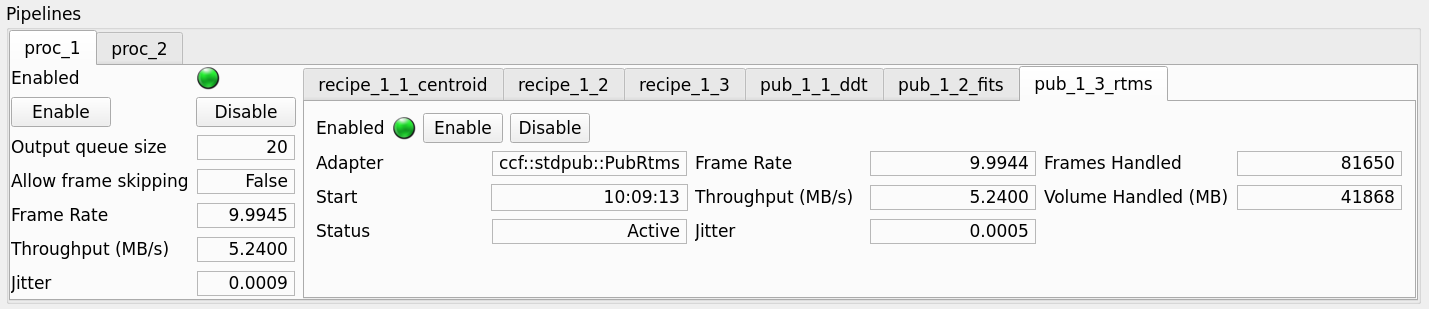
The tabs to the left are used to select which Pipeline to view. In this case two Pipelines are defined in the CCF Configuration, named “proc_1” and “proc_2” (note, the names can be chosen freely and should reflect the purpose of the Pipeline).
To the right the tabs contains the Recipes and Publisher configured for each Pipeline. Some status information is shown for each Recipe and Publisher.
The version of the GUI for IFWv5, does not provide all parameters and also does not provide the option of setting up the adapters via the Setup command. This will be added in the next version.
Logs Output Widget
The Logs Output Widget is shown here:

It’s the standard widget used in many ELT panels. By right-clicking in the log output area, it is possible to enable the filter menu. If the widget has been undocked, it is possible to re-dock it in the panel, via the “View->Hide/Unhide Logs” pull-down menu in the panel top-menu.
Connection Status Widget
The connection status widget is shown here:

It indicates if the connection (request/response MAL interface) to the associated CCF server, is working properly, which is signalled by the LED being green. The connection status shown, is the sum of the connections of the three interfaces provided by CCF: “stdif”, “dcsif” and “recif”.