Stereographic vs Polar projection
The sky is a sphere, and the astrolabe is a plane. Representing a
sphere on a plane is always problematic, and no matter what projection
is chosen, it comes with some restrictions and caveats.
Stereographic projection
The stereographic projection preserves the angles between stars, and a
circle in the sky is represented by a circle. This is the projection
used on traditional astrolables - so it is a must for astrolabe
purists. With this projection, it was much simpler to compute the
position of the lines on the plates, and to draw them with a compass.
However, the stereographic projection over-blows the "other side" of
the equator (S for an observer in the Northern hemisphere and
vice-versa). As a consequence, the star map on the rete is truncated
around the tropic (25deg of declination) -even if the sky could be
visible further.
Polar projection
The simpler polar projection does not preserve the shapes:
constellations appear distorted and circles become weird ovals. Each
point has to be computed, and the lines cannot be drawn with a compass
--for a computer-generated plate, this is really not a problem. But it
is possible to represent a much wider area of the sky: the polar
plates go all the way to -50deg (for sites North of 30deg) or to -75
(for sites between the equator and 30deg N) --and opposite for
Sourthern sites. This makes these polar astrolabes much more practical
of observation planning.
Parts of the astrolabe
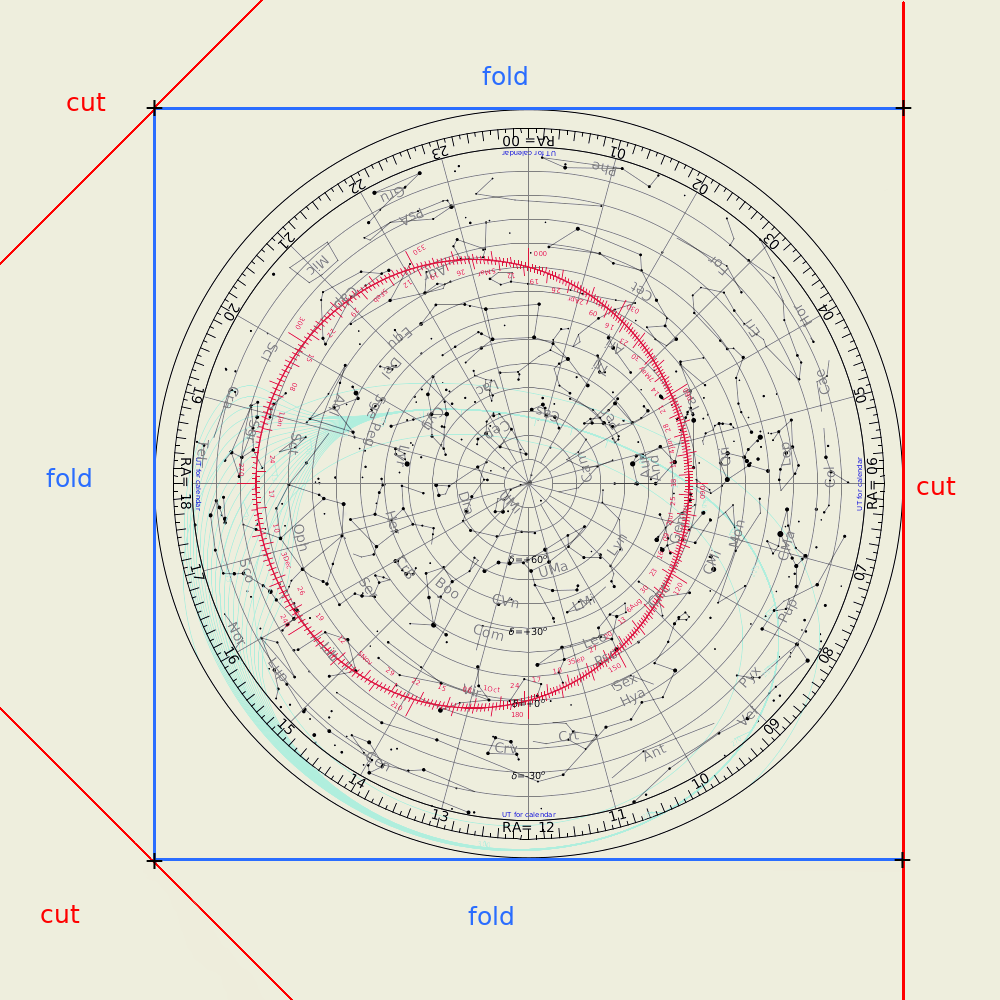
The Rete, with the stars
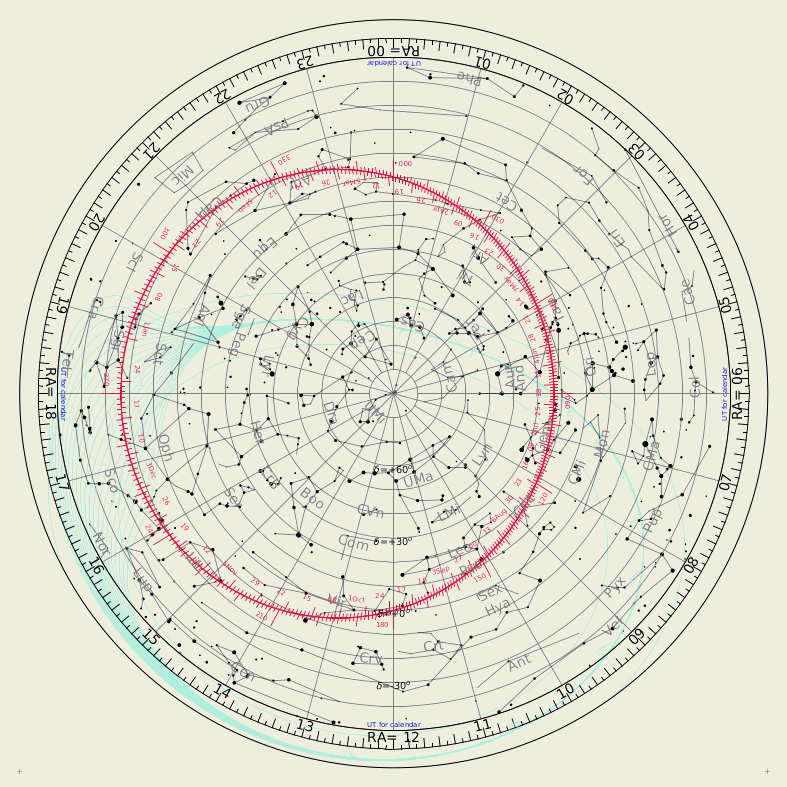
Rete, the star map
File: _rete.pdfThe star background is self-evident... Bright stars, constellation names and lines are printed in black. While a traditional astrolabe had maybe up to 30 stars marked on the rete, we can have hundred of them on a transparent rete.
The disk of the Milky Way is represented as in purple, including the 3 lines at galactic latitudes -10, 0, 10, and the extent of the bulge is represented by flaring lines. The galactic equator is marked with galactic longitudes.
The black grid is in Right Ascension (labelled in large black character on the rim), and Declination (look for values on the RA=12 medirian).
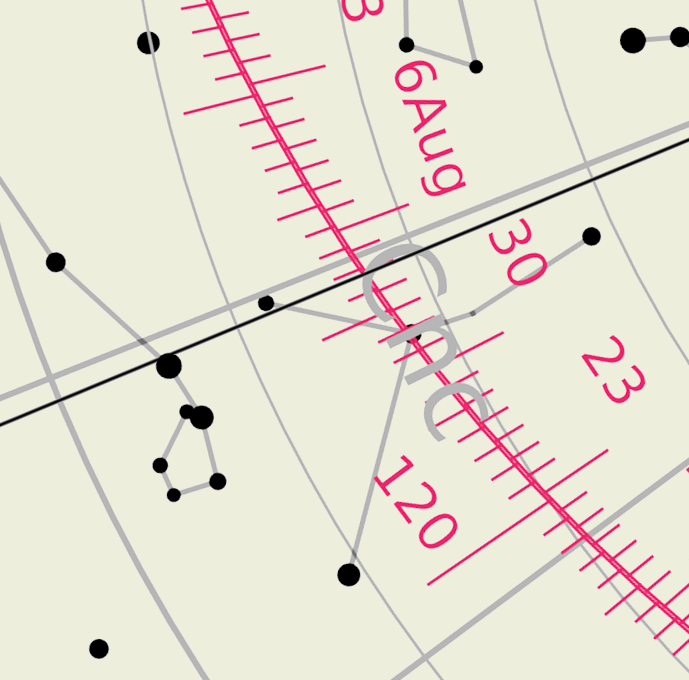
The ecliptic is the thick red line, graduated in ecliptic longitude. The second graduation is a calendar giving the position of the Sun at ~1deg. The position of the Sun can be marked either with its longitude or with the calendar.
In polar projection, four different retes can be generated: for latitudes between 0 and 30deg North, or above 30deg N, and symmetric in the South. A given rete can be used for any mater plate in the same longitude group. In stereographic projection, only 2 retes can be produced, for the Northern and Southern hemispheres.
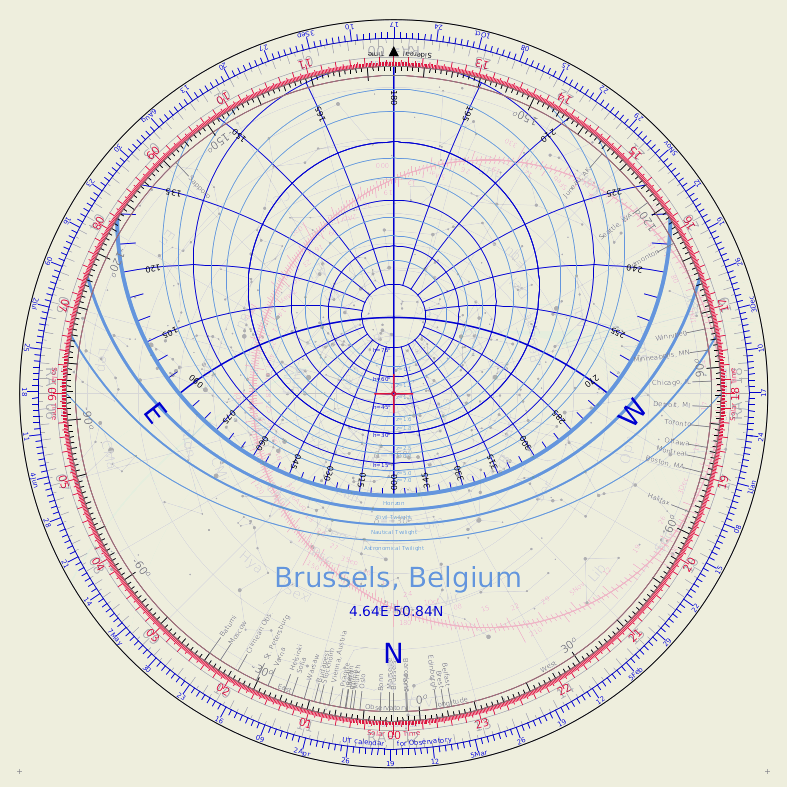
The Mater and Plates
Mater and Plate
File: _plate.pdfThe Mater --traditionally holding the astrolabe together, with a graduated rim-- and the plate are printed together.
The blue grid represents the sky above the horizon, the thick blue line. The grid is graduated in Azimuth (values along the horizon) and in elevation (blue almucantars) and airmass (light-blue almucantars) -airmass is used by astronomers to evaluate the extinction by the atmosphere. Three additional almucantars mark the 3 twilights (sun at -6, -12 and -18 degree, for the civil, nautical and astronomical twilights). These blue lines (azimuth and almucantar) are valid only for a given latitude, printed in the center. In practice, a tolerance of about 3 to 5 degrees is acceptable. Beyond that, another plate is needed.
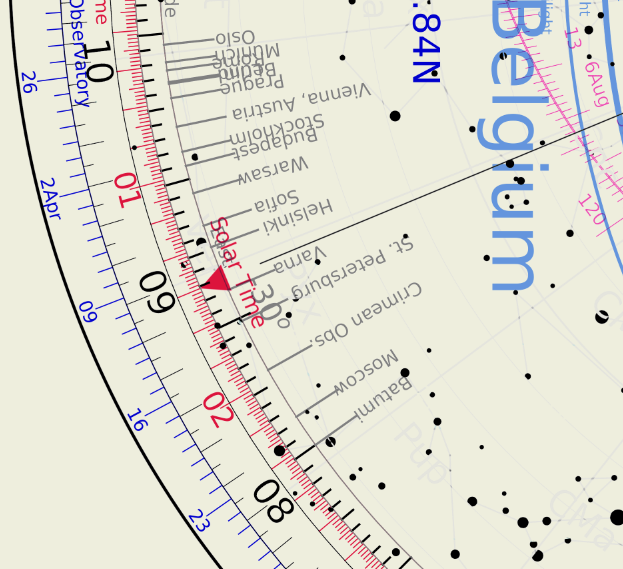
The red rim is graduated in hours, for the Solar Time.
The outer rim, in blue, is a calendar valid only for the longitude of the observatory (also given in the center). For places at the about same latitude, but other longitudes, a correction will need to be applied. This correction is given by the indicated by the grey rim "Observatory Longitude", which also has some cities indicated, within 5deg from the latitude of the observatory.
The Ruler
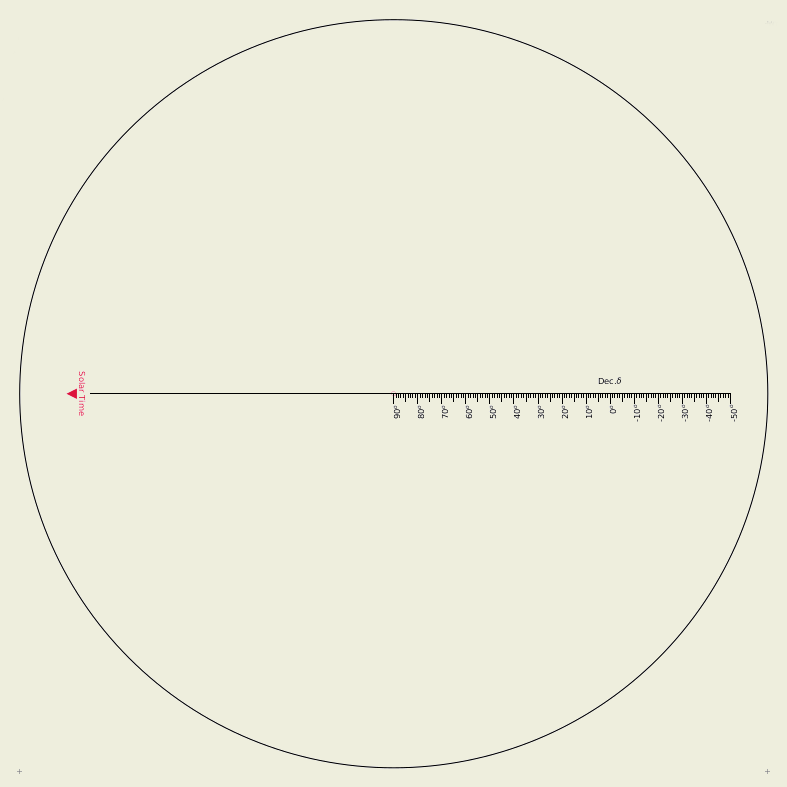
The Rule
File: _rule.pdf
While the traditional ruler looks like ... a ruler, here it just a line printed on a disk. It is necessary for more advanced uses of the astrolabe, and can be ignored in many use cases.
Assembly of the astrolabe
Option 1: the envelope
- Print the plate on cardboard (or print on paper and glue on cardboard); cut along the outside circle.
- Print the rule on transparency; cut along the outside circle.
- Print the rete on transparency - don't cut.
- On the rete, mark to fold (eg with a dead ball-pen, or a blunt knife - don't cut) 3 sides of the square (in blue in the figure) encasing the outside circle. The 4 summits of the square are marked with small crosses close to the edge of the file. Cut along one side of the cardboard (red). Cut the two opposite corners (red) at 45deg to create 3 flaps. Fold the 3 flaps back along the lines.
- Cut a square of the same size in cardboard. Tape the rete on the cardboard square to form an envelope. At this stage, just put little pieces of tape, as you may need to adjust.
- Put the rule and plate in the envelope - it should just fit; you may want to adjust the 3 flaps. The two disks should have just enough space so that they can be rotated in the envelope, but still be well centred on the rete.
Option 2: the pin
Print the plate on cardboard, the rule and the rete on transparency, cut them all 3 along the outside circle. Push a pin through the center of the 3 disks, and secure in a cork.
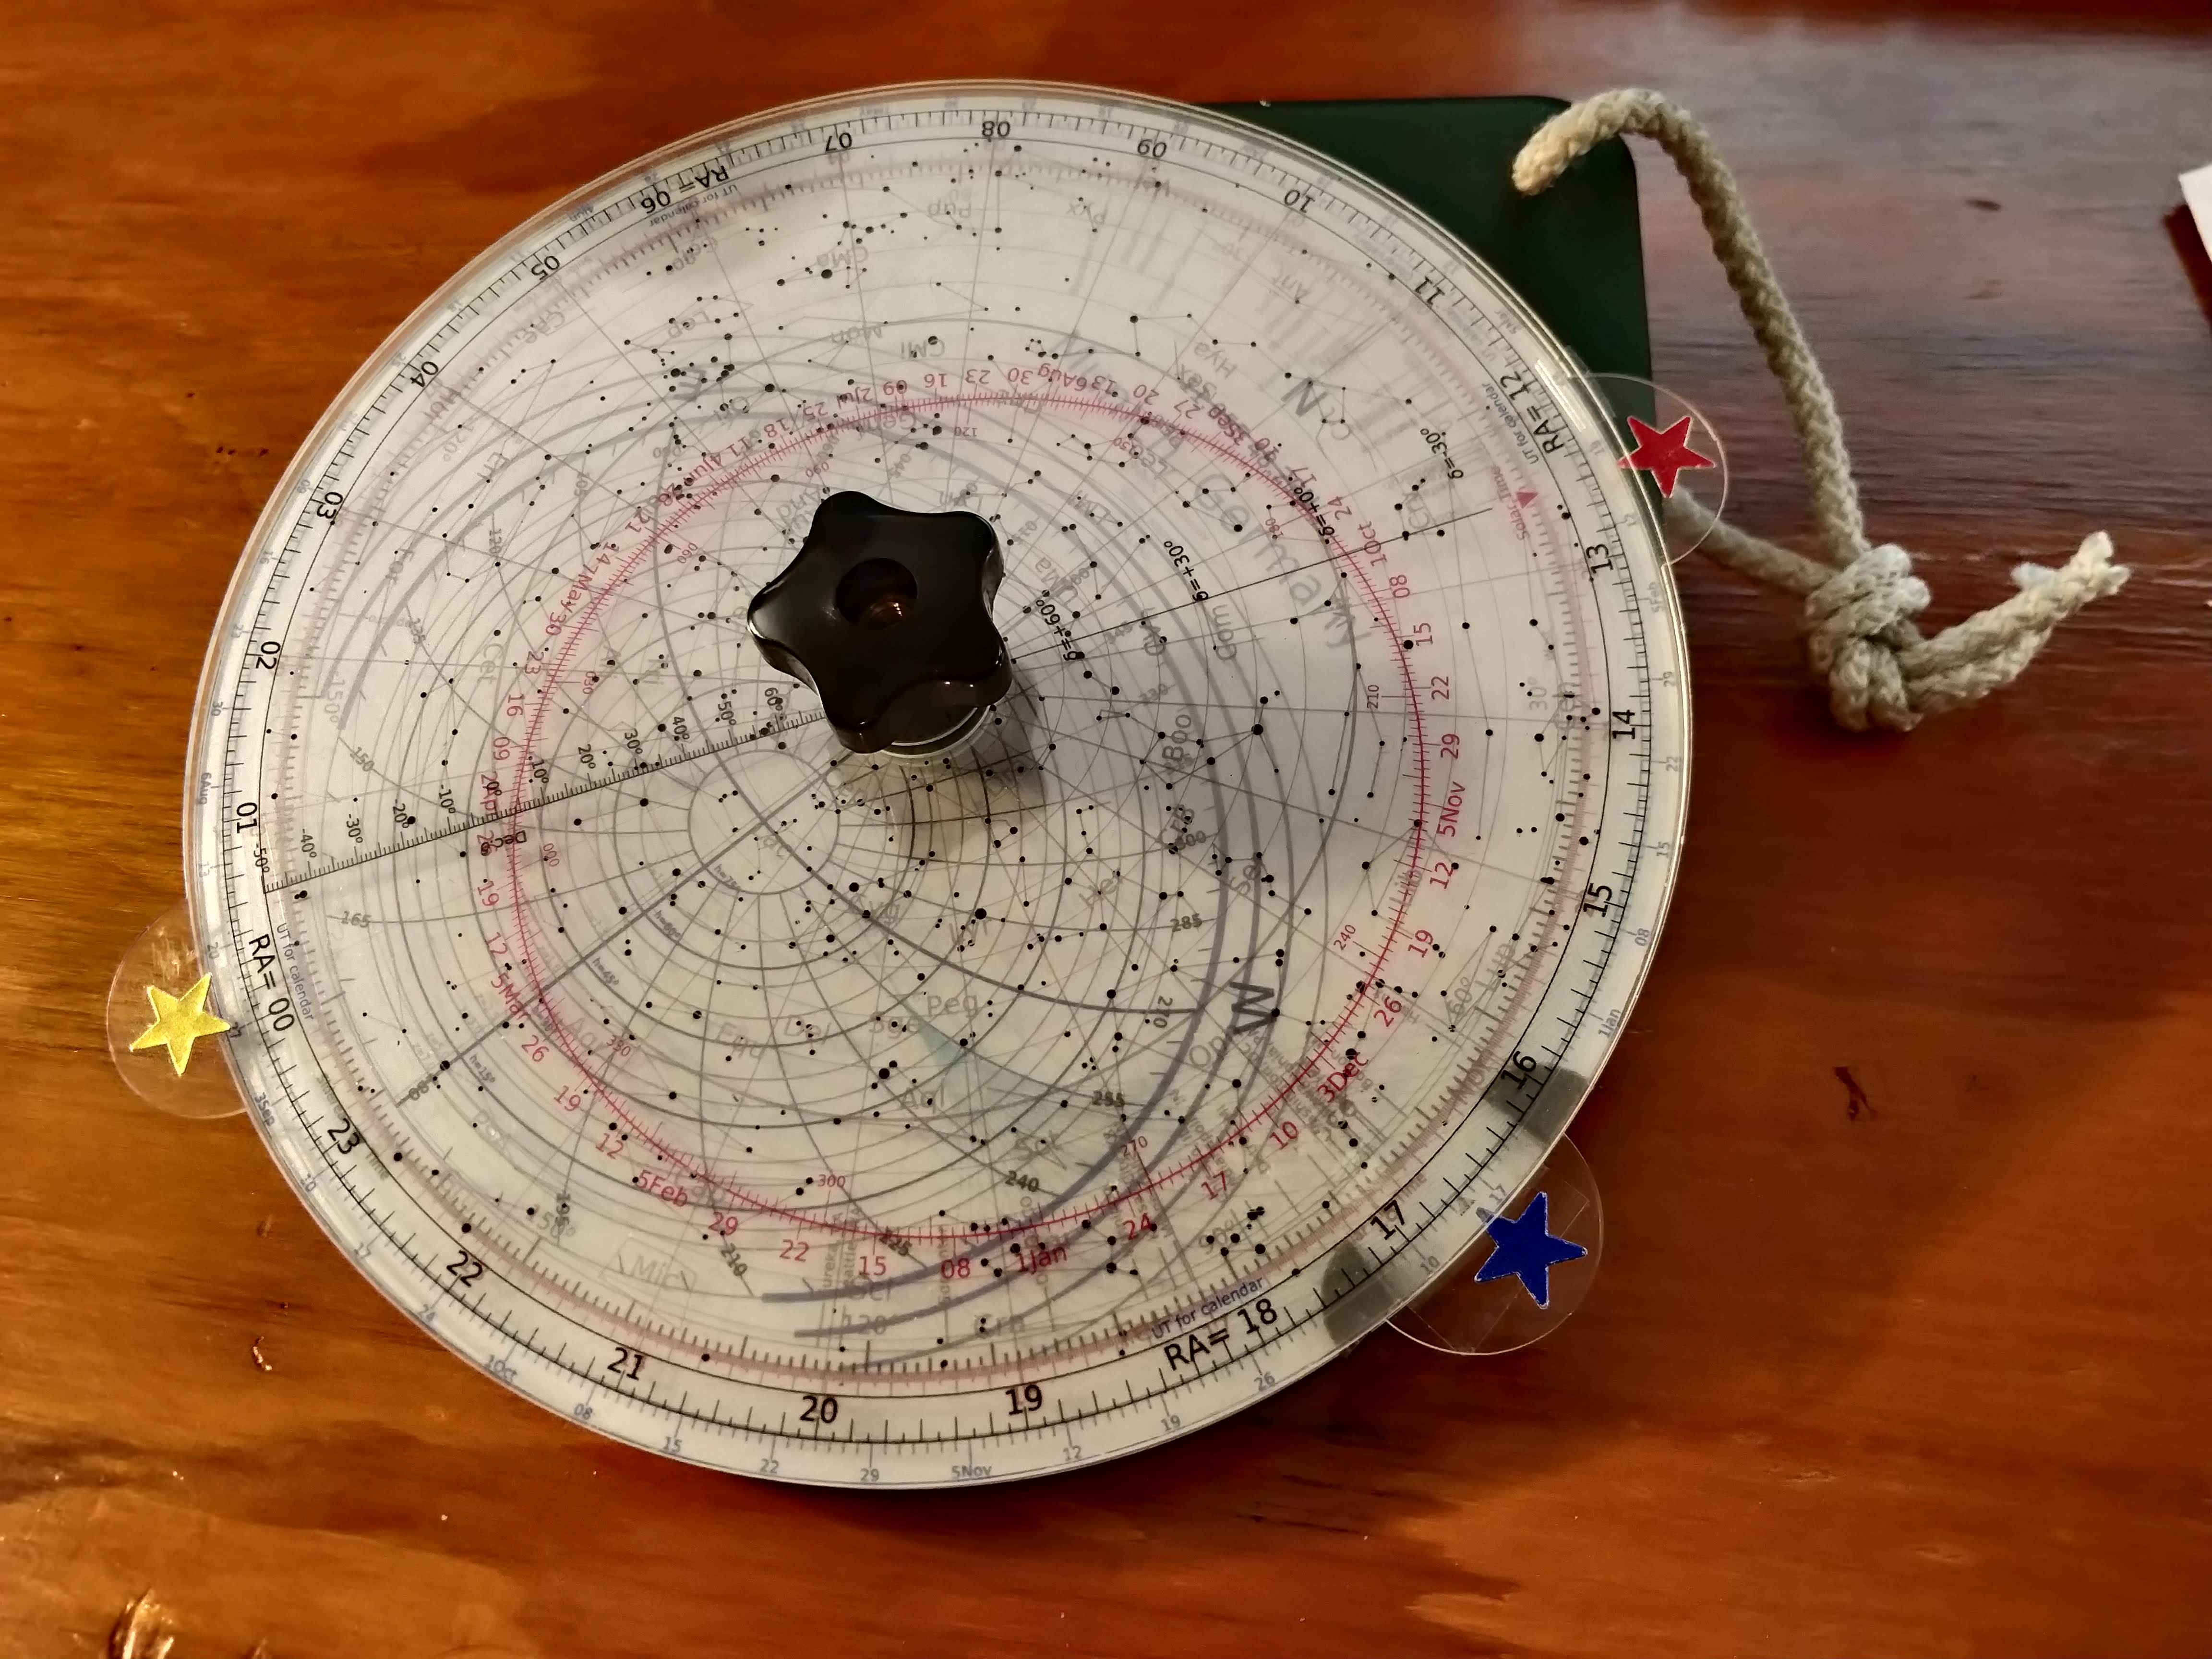
Option 3: pro version
With this option, you print the templates on transparency and on paper as above, but assemble them on laser-cut acrylic. Get one of this mater template cut in opaque, 3mm-thick acrilyc, and 2 (or better, 3) of this rete template cut in 3mm transparent acrylic. The templates come with little washers that are useful to assemble the astrolabe.
- Paste (eg with little pieces of adhesive tape) the mater on the opaque acrylic, taking care of centering it perfectly. Orient it so that the name of the observatory is towards the handle.
- Paste the rete on a clear acrylic (taking care of centering it...). Orient it so that RA=00 is towards the handle.
- Optional, but useful: paste the ruler on a clear acrylic. Orient so that the Sidereal Time marker is towards the handle.
- Optional, but useful: print this calendar marker on transparency, and past it on a clear acrylic. Orient so that the marker is towards the handle.
- Using a 6mm (or 1/4inch) bolt, assemble all the disks:
- Start with a washer, then
- The mater on the opaque acrylic,
- The calendar marker,
- A clear washer,
- The ruler,
- The rete with the stars,
- again a washer.
Fasten gently with a nut. A butterfly nut or knob will be handy.
This is what the result will look like.
Astrolabe user manual
Set the astrolabe for current time

20 Mars at 12h25 UT
Using UT: rotate the disk to bring totay's date (on the rim of the rete) in front of UT time on the mater. This is not the traditional method, but is quite convenient (traditional astrolables did not have the concept of UT...).
Rule (black)
on Sun
on Aug.4 (red)
|
Rotate Rule and
Rete to point to
Solar Time 01h30
|
Using solar time (traditional method).
Rotate the Rule on the Rete to mark the position of the Sun on the ecliptic using the date (or the longitude).
Rotate the Rete together with the Rule to point the local solar time on the outside rim of the Mater (pointing the red "solar time" pointer on the red solar time numbers). Note that there is a difference between your clock local time and the solar time - solar time is exactly Noon when the Sun is to the South, while local official time can be off by up to 1h in winter, and 2h in summer. This difference includes an offset caused by the difference between your longitude and the longitude of your time zone, and because the orbit of the Earth is not perfectly circular.
In both cases, the sky show will be the sky for that time.
Sidereal Time
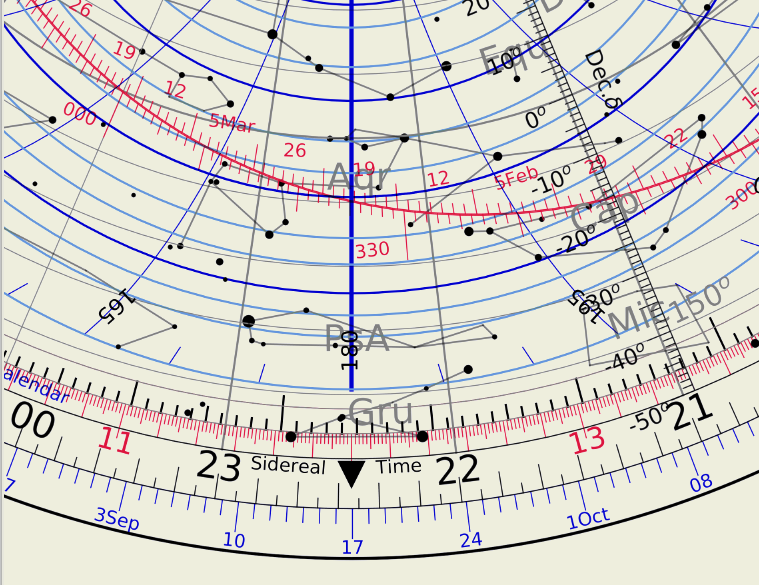
Sidereal Time is 22h26
One the astrolabe is set-up for the time of the observations, you can read the sidereal time on the meridian - see the "sidereal time" pointer - on the Rete right-ascension black scale.
On the other way, if you know the Sideral Time, you can directly set-up the astrolabe for the observation.
Compute the time of sunrise, sunset, twilights
Mark the position of the Sun for today on the ecliptic. Rotate the disk until the sun is on the Horizon (W for Sunset, E for sunrise) or the desired twilight. Read the time either using the outer rim calendar (you will get the UT) or with the ruler going through the Sun (you will get solar time).
Compute the time of rise, transit, set for any star
Pick your star; rotate the disk until the star is where you want it (on the horizon for rise/set, on the meridian for transit). Read the time as above.
Yearly revolution of the Earth
... to illustrate how the sky changes with seasons over the year.
Mark the Sun on the ecliptic, set the astrolabe to local midnight.
Move the Sun by 1 month, re-set the astrolable - the sky rotated by 2h. Repeat...
Show the evolution of length of day with seasons
Set the sun at equinox (when the ecliptic crosses the equator) - measure sunrise and sunset, compute the differences to get the duration of the day and of the night.
Repeat for solstices, and the other equinox, and other points. Yep, day is shorter in winter, because the Sun is far South...
|
