
p2 - Overview
The p2 main User Interface
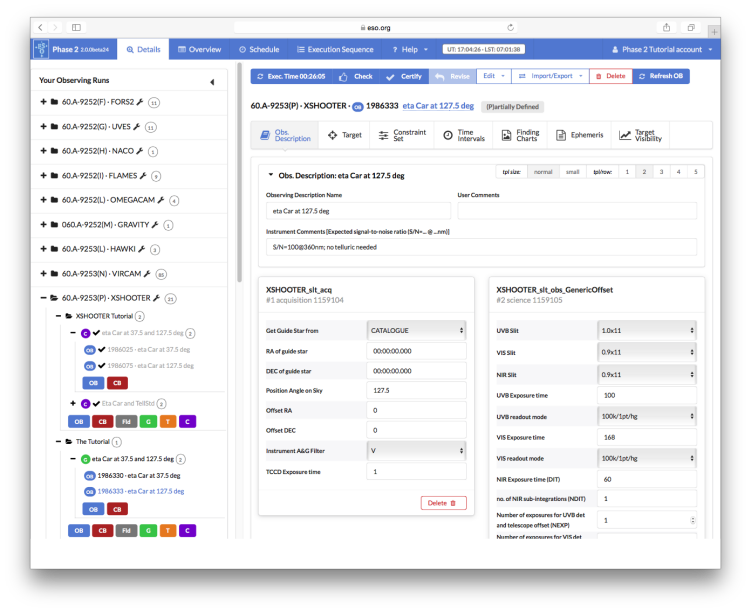
Once you have successfully logged into p2 using your ESO User Portal's credential, the p2 main User Interface (UI) will be displayed in your browser. The appearance of the main p2 UI is similar to that shown in the figure above.

After the log-in, the UI offers on the left hand column the list of approved runs. The content of a tun can be displayed by clicking on the "+" icon. Detailed information related to a selected run/Folder/Scheduling Container/OB are displaied on the right hand side of the page.
On the upper side of the page, the user can select among several tab (see figure above):
Details: by default, at the log-in the Details tab is selected. In this tab the user is able to display and work with the content of any item inside a specific Observing Run. In particular the user can create and edit Folders, Scheduling Containers and OB(s). Please see here for more details on creation of OBs, and handling of scheduling containers.
Overview: The overview lists names of all OBs and Containers and offers a summary of the content of the OBs. In the first column after the list of OBs an icon indicates whether the OB is complete (blue tick mark) or if there are basic parameters missing (white cross in a filled red circle).Then the Observing description, Target and Constraint Set are listed. The user can simply re-name such field by clicking on the name. Alternatively, by clicking on the icons next to the field name, the user is re-directed to the content of that specific OB in the Details tab. Finally the names of the Acquisition Templates, Finding Charts and Ephemeridis File attached to the OB(s) are displaied.
Schedule: The schedule view lists names of all OBs and Containers and indicates in the same way as in the ”Overview” tab, whether the OB is complete or if there are basic parameters missing. The function of the Schedule view is to get an overview of the User Priorities for all the OBs and scheduling containers, and to set-up the observing strategy for the run by adjusting the relative execution priority between different OBs and scheduling containers. The User Priority value can be edited by clicking on the number in the ”Priority” column. The default value is 1, but it should be changed by the user. The lower the User Priority value, the higher the priority for the execution of the given OB and/or container. The lowest priority is assigned to OBs and containers with the User Priority value of 10, and the highest priority is marked by assigning User Priority equal to 1.
The OBs belonging to Groups have the ”Contribution to Group” score. This is an integer number with values from [1 .... MaxGrpContrib] and it is used to compute the dynamical group score and therefore assign relatively higher priority to groups of OBs whose observations have already started.
The OBs belonging to the Time Link containers, that are not the first in the series, have the relative time constraints ”Earliest/Latest After Previous”, which can be edited in the Schedule view. The time delay is expressed in days and hh:mm format. These time constraints are relative in the sense that they refer to the time with zero point being the start time of the successful execution of the previous OB in the series.
Execution Sequence: p2 provides the Visitor user with the possibility to create a Visitor Execution Sequence, which is accessible from the Execution Sequence tab. Only Visitor Mode runs are displayed. Please find more details here.
Help: this pull down menu offers to the user the possibility to consult the help pages (User Manual), check here for a legend explaining the meaning of OB icons used in p2 and the meaning of different OBs and scheduling container status flags (Show legend), ask for help and provide feedback to the ESO User Support Department (USD).
The p2 web tool
Folders
You can structure the contents of your observing run by creating folders under it. Folders can contain observing blocks (OBs), calibration blocks (CBs), Group/Time-link/Concatenation Containers (G/T/C) and sub-folders (Fld). Please see above for specific definition of these items.
Creating an item: OB, CB, G, T, C or Fld
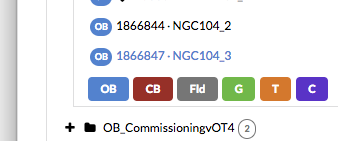
Expand an observing run or folder by clicking its icon, then press the button labelled OB, CB, Fld (for Folder), G/T/C (for group/time-link/concatenation) at the bottom of the expanded items. The new item is appended and selected.
Defining an OB - Add/remove templates

Select an Acquisition Template (AT) from a pull-down menu in the lower part of the Observing Description tab. Click on “add template” to add the selected AT to the OB. Once an AT is added to an OB, one or more Science Templates (ST) can be appended to the same OB. Any template can be removed by clicking on the “remove” icon inside each template.
Changing order of items
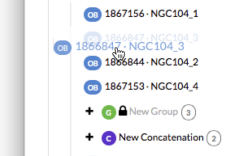
Within the same run or folder, you can change the order of its contained items by dragging a single OB, CB, container or folder and dropping it at the desired position.
Selecting several items

Within the same container (run, folder or scheduling container), you can select several consecutive items by clicking on one item to start a selection and then Shift+Click another item to select all consecutive items from the first one to the second one clicked. Additionally, you can Ctrl+Click (Cmd+Click on MacOS) to add/remove single items to/from a selection.
The action of Check, Certify and Revise can be done on multiple selected items. It is also possible to estimate the total exposure time of the selected items.
Moving and/or Copying items
Select one or several items, then press Ctrl+X (Cmd+X on MacOS) to cut or Ctrl+C (Cmd+C on MacOS) to copy them to the clipboard. Select a destination run or folder and press Ctrl+V (Cmd+V on MacOS) to paste them. The items will be duplicated (in case of copying) and appended to the existing content.
Visitor Execution Sequence (VES)
p2 provides the user with the possibility to create a visitor execution sequence. The latter hence allows any observer to create via the web interface, a sequence of OBs that should be executed at the telescope. The VES is instrument and user dependent. This means that a designated user will not see a VES created by the PI and vice versa.
Add an OB to the VES
Once a given instrument for which the VES should be created is selected, the list of runs associated or delegated to the user for that particular instrument are listed on the left hand section under Your Observing Runs. Please notice that only OBs that have been certified (i.e. are in status ‘+’) can be added to the VES. The same OB can be added multiple times to the VES. Once one or more OBs are added to the VES, they can be executed. The OB will be executed following the numerical order. The order of the OBs in a VES can be changed via simple Drag&Drop action.